quarta-feira, 3 de junho de 2020

Vsftpd Backdoor - Ekoparty Prectf - Amn3S1A Team

It's a 32bits elf binary of some version of vsftpd, where it have been added a backdoor, they don't specify is an authentication backdoor, a special command or other stuff.

I started looking for something weird on the authentication routines, but I didn't found anything significant in a brief period of time, so I decided to do a bindiff, that was the key for locating the backdoor quickly. I do a quick diff of the strings with the command "strings bin | sort -u" and "vimdiff" and noticed that the backdoored binary has the symbol "execl" which is weird because is a call for executing elfs, don't needed for a ftp service, and weird that the compiled binary doesn't has that symbol.


Looking the xrefs of "execl" on IDA I found that code that is a clear backdoor, it create a socket, bind a port and duplicate the stdin, stdout and stderr to the socket and use the execl:


There are one xrefs to this function, the function that decides when trigger that is that kind of systems equations decision:


The backdoor was not on the authentication, it was a special command to trigger the backdoor, which is obfuscated on that systems equation, it was no needed to use a z3 equation solver because is a simple one and I did it by hand.


The equation:
cmd[0] = 69
cmd[1] = 78
cmd[1] + cmd[2] = 154
cmd[2] + cmd[3] = 202
cmd[3] + cmd[4] = 241
cmd[4] + cmd[5] = 233
cmd[5] + cmd[6] = 217
cmd[6] + cmd[7] = 218
cmd[7] + cmd[8] = 228
cmd[8] + cmd[9] = 212
cmd[9] + cmd[10] = 195
cmd[10] + cmd[11] = 195
cmd[11] + cmd[12] = 201
cmd[12] + cmd[13] = 207
cmd[13] + cmd[14] = 203
cmd[14] + cmd[15] = 215
cmd[15] + cmd[16] = 235
cmd[16] + cmd[17] = 242

The solution:
cmd[0] = 69
cmd[1] = 75
cmd[2] = 79
cmd[3] = 123
cmd[4] = 118
cmd[5] = 115
cmd[6] = 102
cmd[7] = 116
cmd[8] = 112
cmd[9] = 100
cmd[10] = 95
cmd[11] = 100
cmd[12] = 101
cmd[13] = 106
cmd[14] = 97                    
cmd[15] = 118
cmd[16] = 117
cmd[17] = 125


The flag:
EKO{vsftpd_dejavu}

The binary:
https://ctf.ekoparty.org/static/pre-ekoparty/backdoor


More articles


  1. Pentest Tools For Windows
  2. Hackerrank Sql
  3. Hacker Types
  4. Hacker Attack
  5. Pentesting Tools
  6. Hacking Gif
  7. Pentest Vs Ceh
  8. Pentest Blog
  9. Hacking The System
  10. Pentest Usb
  11. Hackerrank
  12. Pentest Security

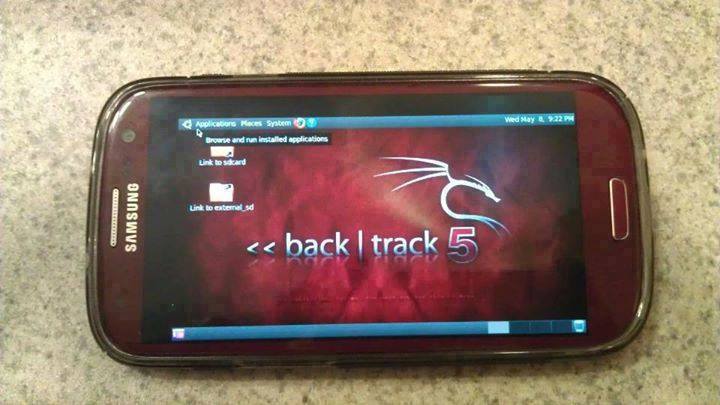
How To Install And Run Backtrack On Android

Guide you step by step to How to install and run Backtrack on android. As the Backtrack is also available with ARM architecture which makes it possible to run Backtrack on an ARM machine such as mobiles or tablets.
Recently, We are discussed Install and Run BackTrack on Windows. Android is the best OS for penetration testing. It designed for digital forensics and penetration testing or hacking tool. It comes with many more updated tools. As the Backtrack is also available with ARM architecture which makes it possible to run Backtrack on an ARM machine such as mobiles or tablets.
How To Install and Run Backtrack On AndroidRequirements
Step to Install and Run Backtrack On Android:
First of all extract the BT5-GNOME-ARM.7z. and copy the "BT5" folder and then put in your phone's root directory. Here mine phone is /sdcard. The root directory is different for different mobile devices.
  • Now install all the above apps BusyboxAndroid TerminalAndroid Vnc.
  • After installing BusyBox application open it and wait until it finishes loading and then click on Smart install.
  • Now open the android terminal and type the following command:
    su cd /sdcard/BT5sh bootbtNOTE :- When you type su in terminal it will ask you for superuser request and you have to tap on Grant.
  • After this, type the following commands in terminal.
    export USER=rootvncpasswd
  • After entering vncpasswd the terminal will ask you to enter the password. Enter the desired password and hit enter.
  • Now type the following commands.
    tightvncserver -geometry 1280×720
  • The terminal emulator will create the localhost to connect it to VNC server. Now note the localhost port marked red below. Now minimize the terminal emulator.
  • Open the Android VNC and type the following settings.
Nickname : BT5
Password : your password here which you entered in terminal (step no.6)
Address : localhost
Port : 5906
NOTE: Make sure that your localhost's port matches with terminal's localhost. Here mine New 'X' desktop is localhost:6. You may be different. So, in VNC type Port 590X where the "X" is the localhost in the android terminal.
That's it now just tap on connect to run the Backtrack on your android. So in this way you successfully install and run backtrack 5 on android. If you face any problem feel free to discuss in below comments!

More information


  1. How To Pentest A Website
  2. Pentest Tools Free
  3. Hacker
  4. Hacking Health
  5. Pentest Smtp
  6. Hacking Forums
  7. Hacking Vpn
  8. Hacking Names
  9. Pentest Linux
  10. Pentest Vpn
  11. Pentest Free
  12. Hacker Videos
  13. Pentest Web Application
  14. Hacking Typer

Steghide - A Beginners Tutorial


All of us want our sensitive information to be hidden from people and for that we perform different kinds of things like hide those files or lock them using different softwares. But even though we do that, those files  attractive people to itself as an object of security. Today I'm going to give you a slight introduction to what is called as Steganography. Its a practice of hiding an informational file within another file like you might have seen in movies an image has a secret message encoded in it. You can read more about Steganography from Wikipedia.


In this tutorial I'm going to use a tool called steghide, which is a simple to use Steganography tool and I'm running it on my Arch Linux. What I'm going to do is simply encode an image with a text file which contains some kind of information which I don't want other people to see. And at the end I'll show you how to decode that information back. So lets get started:


Requirements:

1. steghide
2. a text file
3. an image file

After you have installed steghide, fire up the terminal and type steghide


It will give you list of options that are available.


Now say I have a file with the name of myblogpassword.txt which contains the login password of my blog and I want to encode that file into an Image file with the name of arch.jpg so that I can hide my sensitive information from the preying eyes of my friends. In order to do that I'll type the following command in my terminal:


steghide embed -ef myblogpassword.txt -cf arch.jpg


here steghide is the name of the program

embed flag is used to specify to steghide that we want to embed one file into another file
-ef option is used to specify to steghide the name (and location, in case if its in some other directory) of the file that we want to embed inside of the another file, in our case its myblogpassword.txt
-cf option is used to specify the name (and location, in case if its in some other directory) of the file in which we want to embed our file, in our case its an image file named arch.jpg

After typing the above command and hitting enter it will prompt for a password. We can specify a password here in order to password protect our file so that when anyone tries to extract our embedded file, they'll have to supply a password in order to extract it. If you don't want to password protect it you can just simply hit enter.


Now myblogpassword.txt file is embedded inside of the image file arch.jpg. You'll see no changes in the image file except for its size. Now we can delete the plain password text file myblogpassword.txt.


In order to extract the embedded file from the cover file, I'll type following command in the terminal:


steghide extract -sf arch.jpg -xf myblogpass.txt


here steghide is again name of the program
extract flag specifies that we want to extract an embedded file from a stego file
-sf option specifies the name of the stego file or in other words the file in which we embedded another file, in our case here its the arch.jpg file
-xf option specifies the name of the file to which we want to write our embedded file, here it is myblogpass.txt
(remember you must specify the name of file with its location if its somewhere else than the current directory)

After typing the above command and hitting enter, it will prompt for a password. Supply the password if any or otherwise just simply hit enter. It will extract the embedded file to the file named myblogpass.txt. Voila! you got your file back but yes the image file still contains the embedded file.


That's it, very easy isn't it?


It was a pretty basic introduction you can look for other things like encrypting the file to be embedded before you embed it into another file and so on... enjoy
:)

Continue reading


How To Start | How To Become An Ethical Hacker

Are you tired of reading endless news stories about ethical hacking and not really knowing what that means? Let's change that!
This Post is for the people that:

  • Have No Experience With Cybersecurity (Ethical Hacking)
  • Have Limited Experience.
  • Those That Just Can't Get A Break


OK, let's dive into the post and suggest some ways that you can get ahead in Cybersecurity.
I receive many messages on how to become a hacker. "I'm a beginner in hacking, how should I start?" or "I want to be able to hack my friend's Facebook account" are some of the more frequent queries. Hacking is a skill. And you must remember that if you want to learn hacking solely for the fun of hacking into your friend's Facebook account or email, things will not work out for you. You should decide to learn hacking because of your fascination for technology and your desire to be an expert in computer systems. Its time to change the color of your hat 😀

 I've had my good share of Hats. Black, white or sometimes a blackish shade of grey. The darker it gets, the more fun you have.

If you have no experience don't worry. We ALL had to start somewhere, and we ALL needed help to get where we are today. No one is an island and no one is born with all the necessary skills. Period.OK, so you have zero experience and limited skills…my advice in this instance is that you teach yourself some absolute fundamentals.
Let's get this party started.
  •  What is hacking?
Hacking is identifying weakness and vulnerabilities of some system and gaining access with it.
Hacker gets unauthorized access by targeting system while ethical hacker have an official permission in a lawful and legitimate manner to assess the security posture of a target system(s)

 There's some types of hackers, a bit of "terminology".
White hat — ethical hacker.
Black hat — classical hacker, get unauthorized access.
Grey hat — person who gets unauthorized access but reveals the weaknesses to the company.
Script kiddie — person with no technical skills just used pre-made tools.
Hacktivist — person who hacks for some idea and leaves some messages. For example strike against copyright.
  •  Skills required to become ethical hacker.
  1. Curosity anf exploration
  2. Operating System
  3. Fundamentals of Networking
*Note this sites


Related posts

sexta-feira, 22 de maio de 2020

New DNS Vulnerability Lets Attackers Launch Large-Scale DDoS Attacks

Israeli cybersecurity researchers have disclosed details about a new flaw impacting DNS protocol that can be exploited to launch amplified, large-scale distributed denial-of-service (DDoS) attacks to takedown targeted websites. Called NXNSAttack, the flaw hinges on the DNS delegation mechanism to force DNS resolvers to generate more DNS queries to authoritative servers of attacker's choice,

via The Hacker News

More articles


Fragroute


"fragroute intercepts, modifies, and rewrites egress traffic destined for a specified host, implementing most of the attacks described in the Secure Networks "Insertion, Evasion, and Denial of Service: Eluding Network Intrusion Detection" paper of January 1998. It features a simple ruleset language to delay, duplicate, drop, fragment, overlap, print, reorder, segment, source-route, or otherwise monkey with all outbound packets destined for a target host, with minimal support for randomized or probabilistic behaviour. This tool was written in good faith to aid in the testing of network intrusion detection systems, firewalls, and basic TCP/IP stack behaviour." read more...

Website: http://monkey.org/~dugsong/fragroute

More articles


USE OF CRYPTOGRAPHY IN HACKING

WHAT IS CRYPTOGRAPHY?

The Cryptography is derived from the Greek words "Kryptos". This is the study of secure communication techniques that allow only the sender and recipient of a message to view it's contents of transforming information into nonhuman readable form or vice versa is called cryptography.

As we know that information plays a vital role in running of any business and organizations etc, sensitive details in the wrong hands can leads to loss of business.

Cryptography is the science of ciphering and deciphering messages.To secure communication organizations use cryptology to cipher information .

                            Or

Cryptography is a method of protecting information and communication through the use of codes so that only those whom the information is intended can read and process it.

In Computer Science, Cryptography refers to secure information and communication techniques derived from mathematical concepts , a set of rule based calculations called algorithm to transform message in ways the hard to readable for human.

This is one of the secure way of communications for a hacker with the help of virtual private network(VPN) like Tor Browser which is also very helpful to change the IP Address(Location of the sender ) for illegal purpose to perform crime in cyberspace . I will discuss in brief about the VPN .


How to Encrypt and Decrypt the text in Cryptography?

Open this website with the help of internert surfing for encryption-"http://wwwmd5online.org" 

Open the link for Decrypt the code text-"http://www.md5online.org/md5-decrypt.html"

Type whatever you want for encryption and it will crypt in the code form, copy that code and forward to the intended person whom you want for secure communication and then he/she will Decrypt in the real form.


Related word

The Pillager 0.7 Release

I spent the last couple days recoding the Pillager, getting rid of bugs, optimizing code, making it more extendable and more solid overall. So this post is to release the new code.  However, with that being said, the Pillager is in mass revision right now and I added some more developers to the team to add a whole host of new database attacking features as well as moving past databases and into other areas of post exploitation pillaging. Soon to be released..  As usual this tool and any tool i create is based on my issues when performing penetration tests and solves those problems.. If you have any insight or comments i will certainly take them into consideration for future releases.

For now check out Version 0.7.. Named searches and Data searches via external config files are now functioning properly as well as other bugs fixed along the way... Drop this in a BT5 VM and make sure you have your DB python stuff installed per the help docs and you should be good to go.  If you are looking to use oracle you are going to have to install all the oracle nonsense from oracle or use a BT4r2 vm which has most of the needed drivers minus cxoracle which will need to be installed.

http://consolecowboys.org/pillager/pillage_0.7.zip


Ficti0n$ python pillager.py
 
[---] The Database Pillager (DBPillage) [---]
[---] CcLabs Release [---]
[---] Authors: Ficti0n, [---]
[---] Contributors: Steponequit [---]
[---] Version: 0.7 [---]
[---] Find Me On Twitter: ficti0n [---]
[---] Homepage: http://console-cowboys.blogspot.com [---]

Release Notes:
 --Fixed bugs and optimized code
 --Added Docstrings
 --Fixed Named and Data searches from config files                 

About:
The Database Pillager is a multiplatform database tool for searching and browsing common
database platforms encountered while penetration testing. DBPillage can be used to search
for PCI/HIPAA data automatically or use DBPillage to browse databases,display data.
and search for specified tables/data instances.
DBpillage was designed as a post exploitation pillaging tool with a goal of targeted
extraction of data without the use of database platform specific GUI based tools that
are difficult to use and make my job harder.

Supported Platforms:
        --------------------
-Oracle
-MSSQL
-MYSQL
        -PostGreSQL
     

        Usage Examples:
        ************************************************************************
        
        For Mysql Postgres and MsSQL pillaging:
        ---------------------------------------
        python dbPillage -a [address] -d [dbType] -u [username] -p [password]
        
        
        For Oracle pillaging you need a SID connection string:
        ------------------------------------------------------
        python dbPillage-a [address]/[sid] -d [dbType] -u [username] -p [password]
        

        Grab some hashes and Hipaa specific:(Default is PCI)
        ------------------------------------
        python dbPillage -a [address] -d [dbType] -u [username] -p [password] --hashes -s hipaa


Drop into a SQL CMDShell:
-------------------------
        python dbpillage.py -a [address] -d [dbType] -u [username] -p [password] -q

Config file specified searches:
-------------------------------
Search for data Items from inputFiles/data.txt:
        python dbpillage.py -a [address] -d [dbType] -u [username] -p [password] -D

Search for specific table names from inputFiles/tables.txt:
python dbpillage.py -a [address] -d [dbType] -u [username] -p [password] -N


        Switch Options:
        ---------------------
        -# --hashes = grab database password hashes
        -l --limit  = limit the amount of rows that are searched or when displaying data (options = any number)
        -s --searchType = Type of data search you want to perform (options:pci, hipaa, all)(PCI default)
        -u --user = Database servers username
        -p --pass = Password for the database server
        -a --address = Ipaddress of the database server
        -d --database = The database type you are pillageing (options: mssql,mysql,oracle,postgres)
        -r --report = report format (HTML, XML, screen(default))
        -N --nameSearch = Search via inputFiles/tables.txt
        -D --dataSearch = Targeted data searches per inputFiles/data.txt
-q --queryShell = Drop into a SQL CMDshell in mysql or mssql
     
     
        Prerequisites:
        -------------
        python v2  (Tested on Python 2.5.2 BT4 R2 and BT5 R3 - Oracle stuff on BT4r2 only unless you install the drivers from oracle)
        cx_oracle (cx-oracle.sourceforge.net)
        psycopg2  (initd.org/psycopg/download/)
        MySQLdb   (should be on BT by default)
        pymssql   (should be on BT by default)
     

Related word


How To Create Fake Email Address Within Seconds

How To Create Fake Email Address Within Seconds

How To Create Fake Email Address Within Seconds

Email address is a type of identification by which an email receiver identifies the person who sends mail to him/her. That's why while creating an email address you need to enter your personal details that must be valid. However, what if we tell you that you can create an email address that doesn't require any validation of personal details and that email address gets permanently deleted after your work is done. So here we have a method To Create Fake Email Address. By this, you can create a fake email address that will get auto-deleted after ten minutes. Just follow the below steps to proceed.

Note:  The method we are discussing is just for a known purpose and should not be used for any illegal purposes, as we will be not responsible for any wrongdoing.

How To Create Fake Email Address Within Seconds

The method of creating a fake email address is very simple and easy as these are based on online websites that will provide you a free email address without taking any personal details from you.

#1 10 Minute Mail

10 Minute Mail
10 Minute Mail
10 Minute Mail will provide you a temporary e-mail address. Any e-mails sent to that address will show automatically on the web page. You can read them, click on links, and even reply to them. The email address will expire after 10 minutes.

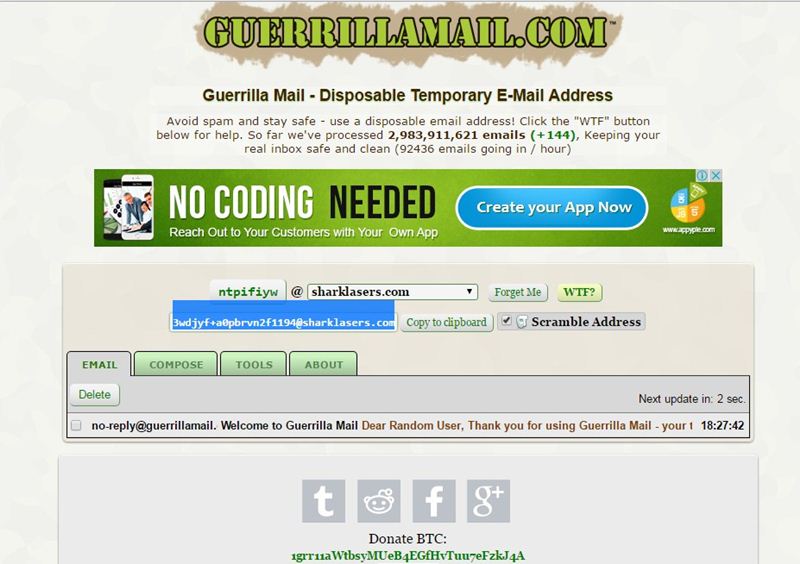
#2 GuerrillaMail

Guerrillamail
Guerrillamail
It is one of the most user-friendly ones out there, with this, you can get disposable email ID easily. You need to enter the details, and the fake email ID will be generated. Moreover, this also lets you send emails with attachment up to 150MB. You will be provided with a temporary email address which you can use to verify some websites which require the email address.

#3 Mailinator

Mailinator
Mailinator
Mailinator is a free, Public, Email System where you can use any inbox you want. You will be given a Mailinator address which you can use anytime a website asks for an email address. The public emails you will receive will be auto-deleted after few hours of receiving.

#4 MailDrop

MailDrop
MailDrop
Maildrop is a great idea when you want to sign up for a website but you are concerned that they might share your address with advertisers. MailDrop is powered by some of the spam filters created by Heluna, used in order to block almost all spam attempts before they even get to your MailDrop inbox. This works the same way like Mailinator in which you will be given a temporary Email address which you can use to verify sites etc.

#5 AirMail

AirMail
AirMail
AirMail is a free temporary email service, you are given a random email address you can use when registering to new websites or test-driving untrusted services. All emails received by AirMail servers are displayed automatically in your online browser inbox.
Related posts